

Listen to this article
This guide provides a step-by-step primer on setting up an ELT (Extract, Load, Transform) pipeline using Firebolt and dbt. We will use the Atomic Adtech sample dataset, configuring Firebolt for database management, and demonstrating how to handle external tables and transform data effectively.
Prerequisites for this primer is a functional Python environment with accessibility to the internet and an existing Firebolt organization and account. If you do not have a Firebolt account, you can easily register for a free account.
Sample dataset
For this exercise we’re going to be working with the Atomic Adtech sample dataset. Atomic is a fictitious ad tech company. We’ll be dealing with several data elements and turning them into internal tables in Firebolt. The goal is to mirror the source system at any point in time, requiring us to sort through the exports, as well as insert and update records as required. This sample dataset is made available through an S3 bucket mentioned in the subsequent sections. Complete models can be found at the following Github repo.
The source dataset contains a large fact table and four dimension tables. The session_log table tracks user engagement in the form of ‘request’, ‘impression’, ‘click’ and ‘conversion’ events. Advertiser, campaigns, publisher and publisher_channel provide additional context on the user engagement.

The source system dumps data from these tables to object storage in parquet format on a scheduled basis. Every dump includes all inserts, updates and deletes since the last dump for each table. Session_log is an append-only table, so it’s a bit different. It’s important to note, all other tables could appear in multiple dumps. If an advertiser’s name changes, it’ll appear in one file, then in a newer file with the new name.

Our goal is to mirror all the data from the source system as of the last dump in Firebolt allowing for efficient reporting.
Database configuration
In this section, we walk through the steps required to set up a Firebolt database and configure appropriate security. To utilize dbt with Firebolt, setting up a service account is essential. Service accounts in Firebolt are used to provide continuous, programmatic access to the database resources, allowing applications like dbt to perform necessary operations. This section guides you through the steps required to create a service account, configure Role-Based Access Control (RBAC) for this service account.
Step 1: Database creation
CREATE DATABASE demo_atomic_adtech;Step 2: Configuring RBAC
CREATE ROLE atomic_modifiers;

GRANT USAGE ON DATABASE demo_atomic_adtech TO atomic_modifiers;

GRANT MODIFY ON DATABASE demo_atomic_adtech TO atomic_modifiers;
Step 3: Creating a service account for programmatic access from dbt
CREATE SERVICE ACCOUNT atomic_dbt_account;

CREATE USER atomic_dbt_account
WITH SERVICE_ACCOUNT = "atomic_dbt_account";
Step 4: Service accounts don’t connect to Firebolt using a username and password, instead they use a client_id and client_secret. To find the client_id, go back to the Firebolt workspace and run:
Next we generate the service account secret for “service account”. Please record the client id and secret for use with dbt configuration later.
CALL fb_GENERATESERVICEACCOUNTKEY ('atomic_dbt_account');Step 5: Assign Role to service account
GRANT ROLE atomic_modifiers TO USER atomic_dbt_account;We’ve created a new role that we can apply permissions to, granted it usage on our target database so it can select from objects, then granted it modify on that database so it can do inserts, deletes, and updates. Then we created a service account at the organization level, a user at the account level, and assigned the user to the atomic_modifiers role. More information on roles and users can be found here: Security | Firebolt documentation, information on service accounts can be found here: Service accounts | Firebolt documentation
dbt configuration
Fire up your python development platform of choice.
Create a new folder for this project. In this case, we called it “DBT_ATOMIC”
In a terminal window, run the following command to install the firebolt adapter for dbt. This command will also install the required dbt-core package.
pip install dbt-core dbt-fireboltThen inside that folder run:
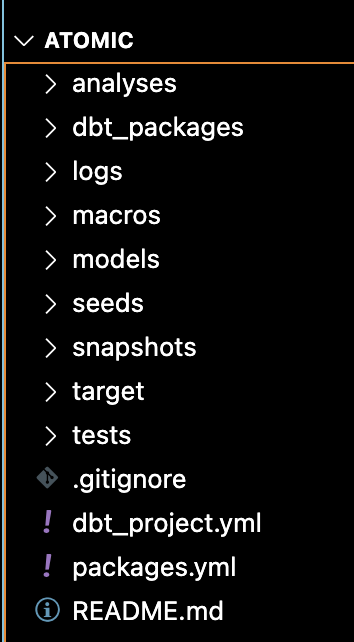
dbt initWhen prompted for a name for the project, enter “atomic”; when prompted for a database, select Firebolt. This will create the framework to work from as well as all the necessary dependencies. Under the “atomic” project directory, an entire folder structure used by dbt will be created.
By default, ”dbt init” creates sample models, these can be removed by running rm ./atomic/models.
To host our new models, we’ll create a new folder:
mkdir ./atomic/models/my_test_modelWe need to give dbt connectivity information. dbt uses a “profiles.yml” file to store this information in either the local folder, or if not there, the profile of the executing OS user (~/.dbt/profiles.yml). For simplicity’s sake, we’re going to create a local profiles.yml in the “atomic” folder with the following contents:
atomic:
  target: dev
  outputs:
    dev:
      type: firebolt
      client_id: <your client id>
      client_secret: <your client secret>
      database: demo_atomic_adtech
      schema: public
      threads: 10
      account_name: <account-name>
      engine_name: <engine-name>
Replace the placeholders <your client id> and <your client secret> with the values you recorded earlier. Change the database, account_name, engine_name to reflect your configuration. dbt now has access to the database.
Managing external tables
dbt allows for the creation and sourcing of data from external tables in Firebolt. External tables in Firebolt allow exploration and integration of data stored on S3. Data should be stored in one of the supported formats such as Parquet, CSV, AVRO or ORC. This allows us to use a unified platform for both ingestion and transformation. To enable external table capabilities in your project, add the following to your packages.yml file (if you haven’t used packages before, you will have to create the packages.yml file at the project root level - the same level as the dbt_project.yml).
Packages:
  - package: dbt-labs/dbt_external_tables
    version: 0.8.7
Add the following to the dbt_project.yml
dispatch:
  - macro_namespace: dbt_external_tables
    search_order: ['dbt', 'dbt_external_tables']
Then in a terminal window, run the following in a terminal:
dbt depsThis command installs the dependencies that are specified in the “packages.yml” file. Run the following command to validate connectivity to your Firebolt database.
dbt debugModel development
Setting Up Models in dbt
Models in dbt depend on schema, so we need to provide schema information. Follow these steps to set up your dbt models:
1. Create a Source Configuration File
- Navigate to the
modelsfolder in your project. - Create a new file called
source_atomic.ymlin themodels/atomicfolder. - Define the source and destination tables, and any constraints. This helps enforce constraints and simplifies the process.
Example configuration for an external table calledadvertiseris shown below.
sources:
  - name: atomic_adtech
    database: demo_atomic_adtech
    tables:
      - name: ext_advertiser
        external:
          url: "s3://firebolt-sample-datasets-public-us-east-1/adtech/advertiser"
          object_pattern: "*"
          compression: GZIP
          type: '("CSV" skip_header_rows=TRUE)'
        columns:
          - name: advertiser_id
            data_type: bigint
          - name: advertiser_name
            data_type: text
2. Adjust the URL for Your Region
- Note: The public bucket name includes the region. If you're not in the
us-east-1region, replace this string with your appropriate region, e.g.,s3://firebolt-sample-datasets-public-eu-central-1.
3. Create External Tables in Firebolt
Run the following command to create external tables:
dbt run-operation stage_external_sources4. Define Model for Internal Tables
Create a model definition for internal tables. Define attributes that are unique and cannot be assumed from the query.Example for the internal advertiser table:
- name: advertiser
  columns:
    - name: advertiser_id
      tests:
        - unique
        - not_null
Repeat this process for all external and internal tables.
5. Build Models to Transform Data
Create a model to transform data from external tables to internal tables. For the advertiser table, create a file called “advertiser.sql” in the models/atomic folder. The sql model to create this dimension table is shown. This model defines a dimension table with advertiser_id as the unique key and is materialized incrementally. Please note the use of the $source_file_name and $source_file_timestamp metadata fields that Firebolt provides. Using these fields, it is possible to track which files in the S3 bucket specific data rows came from. By using these fields, we identify new files that were ingested into S3 and perform incremental loads as shown below. This model references the external table that was created earlier to integrate with S3 for incremental loads.
{{
    config(
        materialized='incremental',
        unique_key=['advertiser_id'],
        incremental_strategy='delete+insert',
        table_type =  "dimension",
        primary_index = ['advertiser_id']
    )
}}

with src as (
    select
        advertiser_id,
        advertiser_name,
        $source_file_name as source_file_name,
        $source_file_timestamp::timestampntz as source_file_timestamp
    from
        {{ source ('atomic_adtech', 'ext_advertiser') }}
    {%- if is_incremental()  %}
    where
        $source_file_timestamp > (
            select
                coalesce(max(source_file_timestamp), '1980-01-01')
            from
                {{ this }}
        )
    {%- endif %}
)
select
    advertiser_id, advertiser_name, source_file_name, source_file_timestamp
from
    src
where
    (advertiser_id, source_file_timestamp) in (
        select
            advertiser_id,
            max(source_file_timestamp)
        from
            src
        group by all
    )
Repeat this process for all relevant internal tables. Run the model to verify it:
dbt run --full-refreshTest for data quality: Ensure advertiser_id is not null and unique.
dbt testBy following these steps, you can create a structured and efficient workflow for managing your dbt models, ensuring data integrity and optimal performance.
Setting Up Fact/Activity Table in dbt
In this section, we will set up a session_log table that records user activity. We will perform some light transformations on the table during ingestion to improve its performance.
1. Understand the External Session Log
- The external session log contains one row for each event in a session, including request, impression, click, and conversion events.
- Events typically occur in rapid succession, so most events for a given session will be logged if data is loaded every 5 minutes.
- By aggregating sessions and nesting events, we can reduce the internal table size by up to 4x and simplify summarization. Nesting events into arrays helps eliminate self joins and simplifies aggregations.
2. Set Up the Incremental Model
Create a model to transform the external session log data into the internal session log table. This model will aggregate sessions and nest events into arrays. Create a file, for example, “session_log.sql”, in the models/atomic folder and add the following configuration:
{{
    config(
        materialized='incremental',
        unique_key=['userid', 'session_id', 'event_times'],
        incremental_strategy='append',
        table_type = "fact",
        primary_index = ['session_time', 'session_id']
    )
}}
WITH src AS (
    SELECT *,
           $source_file_name as source_file_name,
           $source_file_timestamp::timestampntz as source_file_timestamp
    FROM {{ source('atomic_adtech', 'ext_session_log') }}
    {%- if is_incremental()  %}
    WHERE $source_file_timestamp > (
        SELECT coalesce(max(source_file_timestamp), '2000-01-01')
        FROM {{ this }}
    )
    {%- endif %}
)
SELECT
    userid AS userid,
    ARRAY_AGG(event_name) AS events,
    ARRAY_AGG(revenue) AS revenues,
    session_id,
    max(campaign_id) AS campaign_id,
    COALESCE(publisher_channel.publisher_channel_id, '-1') AS publisher_channel_id,
    page_url,
    ARRAY_AGG(event_time) AS event_times,
    coalesce(MIN(event_time), '2000-01-01') AS session_time,
    date_trunc('month', MIN(event_time)) AS session_month,
    COALESCE(MIN(event_time)::DATE, '2000-01-01') AS event_date,
    user_demographics,
    MAX(src.source_file_name) AS source_file_name,
    MAX(src.source_file_timestamp) AS source_file_timestamp
FROM src
LEFT OUTER JOIN {{ ref('publisher_channel') }} publisher_channel
ON publisher_channel.publisher_channel_name = SPLIT_URL(page_url, '/', 3)
GROUP BY ALL
3. Execute and Test the Model
Run the model to transform the data:
dbt runSummary Transformation in dbt
To summarize event data by important dimensions, we can create a summary table. This example will demonstrate how to summarize activity by distribution channel. User sessions may span multiple ingestion events, resulting in multiple rows in the event_log for the same session. You can use a view to consolidate these rows, but queries against such a view can be slow. To improve performance, materialize this consolidation into a summary table.
1. Define the Incremental Model
Create the Model Configuration:
Create a file, for example, daily_publisher_channel_summary.sql, in the models/atomic folder and add the following configuration:
{{
    config(
        materialized='incremental',
        unique_key=['session_day', 'publisher_channel_id'],
        incremental_strategy='delete+insert',
        table_type = "fact",
        primary_index = ['session_day', 'publisher_channel_id']
    )
}}
-- Step 1: Filter sessions included in any files imported since the last import
WITH session_filter AS (
    SELECT session_id
    FROM {{ ref('session_log') }}
    {%- if is_incremental()  %}
    WHERE source_file_timestamp > (
        SELECT max(max_source_file_timestamp)
        FROM daily_publisher_channel_summary
    )
    {%- endif %}
),

-- Step 2: Consolidate rows using NEST and FLATTEN
src AS (
    SELECT
        userid AS userid,
        ARRAY_FLATTEN(ARRAY_AGG(events)) AS events,
        ARRAY_FLATTEN(array_concat(ARRAY_AGG(revenues))) AS revenues,
        session_id,
        max(campaign_id) AS campaign_id,
        publisher_channel_id,
        page_url,
        ARRAY_FLATTEN(array_concat(ARRAY_AGG(event_times))) AS event_times,
        coalesce(MIN(event_time), '2000-01-01') AS session_time,
        date_trunc('month', MIN(session_month)) AS session_month,
        COALESCE(MIN(event_date)::DATE, '2000-01-01') AS event_date,
        user_demographics,
        MAX(source_file_name) AS source_file_name,
        MAX(source_file_timestamp) AS source_file_timestamp
    FROM {{ ref( 'session_log' ) }}
    WHERE session_id IN (SELECT session_id FROM session_filter)
    GROUP BY ALL
)

-- Step 3: Populate the destination summary table
SELECT
    event_date AS session_day,
    publisher_channel_id,
    SUM(CONTAINS(events, 'Request')::INT) AS Requests,
    SUM(CONTAINS(events, 'impression')::INT) AS impressions,
    SUM(CONTAINS(events, 'click')::INT) AS clicks,
    SUM(CONTAINS(events, 'conversion')::INT) AS conversions,
    SUM((CONTAINS(events, 'click') AND NOT CONTAINS(events, 'impression'))::INT) AS fraudulent_clicks,
    SUM((CONTAINS(events, 'conversion') AND NOT CONTAINS(events, 'impression'))::INT) AS fraudulent_conversions,
    SUM((CONTAINS(events, 'impression') AND CONTAINS(events, 'conversion') AND NOT CONTAINS(events, 'click'))::INT) AS latent_conversions,
    SUM(revenues[INDEX_OF(events, 'impression')]) AS impression_revenue,
    SUM(revenues[INDEX_OF(events, 'click')]) AS click_revenue,
    SUM(revenues[INDEX_OF(events, 'conversion')]) AS conversion_revenue,
    SUM(CASE WHEN (CONTAINS(events, 'click') AND NOT CONTAINS(events, 'impression')) THEN revenues[INDEX_OF(events, 'impression')] + revenues[INDEX_OF(events, 'click')] + revenues[INDEX_OF(events, 'conversion')] ELSE 0 END) AS fraudulent_revenue,
    MAX(source_file_timestamp) AS max_source_file_timestamp
FROM src
GROUP BY ALL
3. Execute and Test the Model
Run the model to transform the data:
dbt run4. Querying the Summary Table
End users and BI analysts can now write queries to support the business in milliseconds. Example query:
SELECT
  SUM(clicks)
FROM
  daily_publisher_channel_summary ps
  INNER JOIN publisher_channel pc ON pc.publisher_channel_id = ps.publisher_channel_id
  INNER JOIN publisher p ON p.publisher_id = pc.publisher_id
WHERE
  p.publisher_name = 'futureengage'
By following these steps, you can create a summary table that improves query performance and supports efficient data analysis.
Summary
This article outlines the process of implementing an ELT pipeline using Firebolt and dbt, demonstrating the consolidation of data ingestion and transformation tasks within a single tool. The guide begins with the necessary database and service account configuration in Firebolt, followed by setting up dbt for managing the data pipeline. The Atomic Adtech sample dataset is used to illustrate the ingestion and transformation process, from creating external tables to developing dbt models for internal tables and running transformations. By leveraging Firebolt's capabilities and dbt's robust framework, the workflow is optimized for efficient data management and reporting, ensuring data integrity and enhanced performance for data applications.
